
How to Get PS2 BIOS for PCSX2 Legally and Safely

Getting the PS2 BIOS for PCSX2 is the first step to making your emulator work. Without it, your PlayStation 2 games won’t load, no matter how well you’ve set up the rest. If you’ve ever tried firing up a game on PCSX2 and nothing happened, it’s likely because the BIOS file is missing.
The BIOS (Basic Input Output System) controls how the console starts and communicates with the game. When you install PCSX2 on your PC, it doesn’t come with the BIOS for legal reasons. You have to provide it yourself usually by dumping PS2 BIOS file from your own PS2 hardware.
In this guide, you’ll learn what the BIOS does, why it’s needed, how to get it safely and legally, and how to add it to PCSX2. By the end, you’ll have everything you need to start playing PS2 games on your PC smoothly. Every step here is tested and reliable, so you can follow along with confidence.
What Is PS2 BIOS and Why You Need It for PCSX2
The PS2 BIOS is a small system file taken from a PlayStation 2 console. It tells the console how to start and how to read game data. Think of it like the engine control system in a car it runs in the background, but nothing works without it.
PCSX2 depends on the BIOS to boot games, manage memory cards, and handle system settings. When you open the emulator for the first time, it looks for this file.
If it’s missing, you’ll see an error or the emulator won’t move past the setup screen.
It must match the region of the game you want to play. For example, a European game may not run well with a Japanese BIOS.
Features of PCSX2 Emulator
PCSX2 is a PlayStation 2 emulator designed for Windows, Linux, and macOS, allowing users to run PS2 games directly on their computer. It replicates the core functionality of the original console, providing a reliable way to revisit classic titles without the need for physical hardware. With support for improved resolution, better frame rates, and customizable settings, PCSX2 offers a smoother and visually enhanced experience.
- Wide Game Compatibility: Runs a large library of PlayStation 2 titles with ongoing improvements through regular updates.
- Enhanced Graphics Options: Supports internal resolution scaling, texture filtering, and anti-aliasing for sharper visuals compared to original PS2 output.
- Custom Configuration: Offers full control over graphics, audio, and controller settings to match individual system requirements and preferences.
- Save State Functionality: Allows games to be saved and loaded instantly at any point, removing reliance on in-game save systems.
- Controller and Input Support: Compatible with keyboard, mouse, and most game controllers, with custom key mapping available.
- Widescreen and Patch Support: Enables widescreen gameplay in titles that didn’t originally support it, using community-created patches.
- Cheat Code Integration: Allows use of cheat files (PNACH) to modify gameplay, test mechanics, or bypass difficult sections.
- Modular Plugin System: Uses a plugin-based design for graphics, input, and audio, allowing flexible setup for different hardware configurations.
- Developer Tools: Includes built-in debugging features for testing, modding, or development purposes.
How to Get PS2 BIOS Legally and Safely?
Obtaining PS2 BIOS files through legal and secure methods involves several steps. The process can take time and depends on meeting specific requirements. Dumping the BIOS from your own PlayStation 2 console remains the most reliable and lawful approach.
Requirements to Get PS2 BIOS
- Your own PlayStation 2 console
- A USB flash drive
- A compatible memory card (8MB official Sony is preferred)
- Software like Free McBoot or uLaunchELF
Steps to Dump the BIOS Legally:
Step 1: Prepare Your PS2 Console
Start by confirming your console model. Most standard PS2 systems support BIOS dumping, but the model number can help you check compatibility. Look at the back of the console near the barcode.
Next, set up a memory card with Free McBoot. This tool allows the PS2 to run homebrew software. If you don’t have it installed already, you can find preloaded memory cards online or follow official instructions to install it yourself.
Step 2: Get Your USB Drive Ready
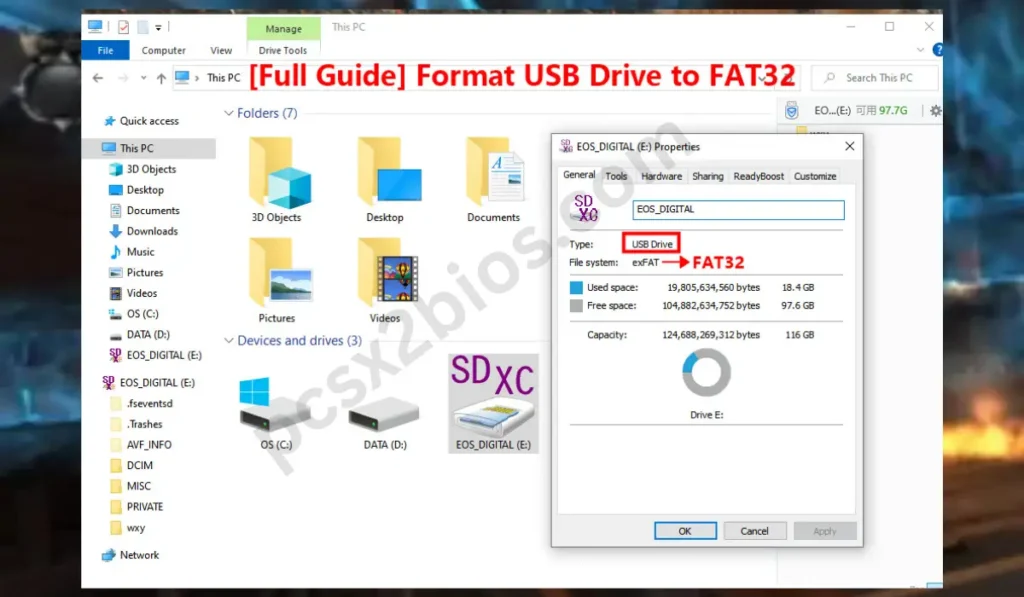
You’ll need a USB flash drive formatted to FAT32, which is the file system recognized by the PS2.
To format it:
- Plug the USB drive into your computer
- Open “This PC” or “My Computer”
- Right-click on the USB drive
- Select “Format”
- Choose FAT32 and click Start
Once formatted, download a BIOS dumper tool. Place the tool in the root directory of the USB drive, not inside a folder.
Step 3: Dump the BIOS Using Your Console
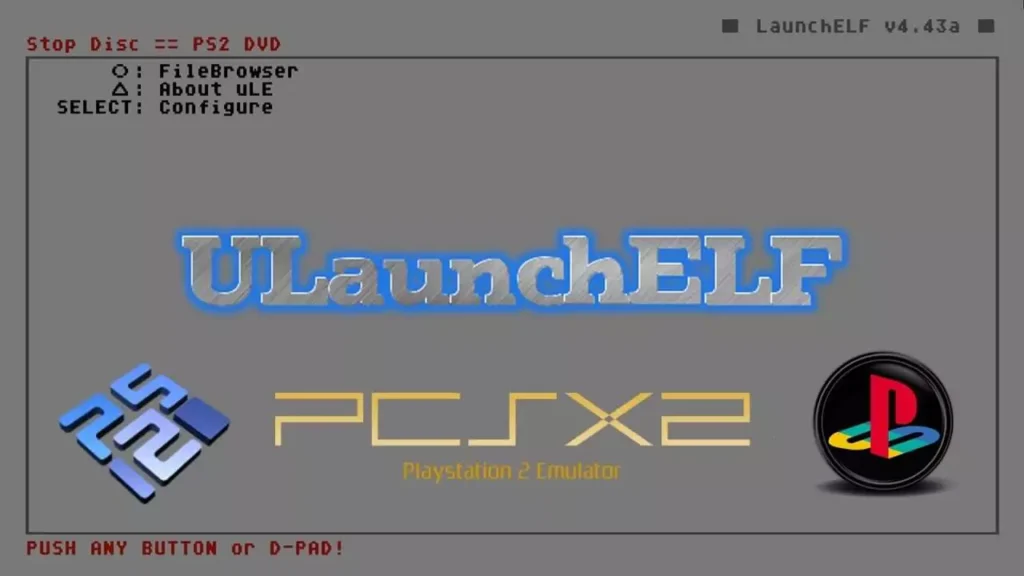
Insert the USB drive and the Free McBoot memory card into the PS2. Turn on the console. The Free McBoot menu should appear.
From here:
- Open uLaunchELF from the main menu
- Navigate to the BIOS dumper on your USB drive
- Launch it and follow the on-screen steps
The BIOS will be saved to your USB once the process finishes. Don’t remove the USB until you see the confirmation message.
Step 4: Move the BIOS File to Your PC
After dumping the BIOS:
- Safely remove the USB drive from the PS2
- Insert it into your computer
- Locate the BIOS file—usually named something like
scph39001.bin - Copy it to a secure folder on your PC
This file is now ready for use with PCSX2.
Check the BIOS File for Accuracy
Before using the BIOS, make sure it hasn’t been damaged during the transfer. You can verify the file’s integrity using an MD5 checksum tool, which confirms the file matches expected data.
Also, check the file size. A valid PS2 BIOS is around 4 MB and ends in .bin. If your file is smaller or incomplete, repeat the process.
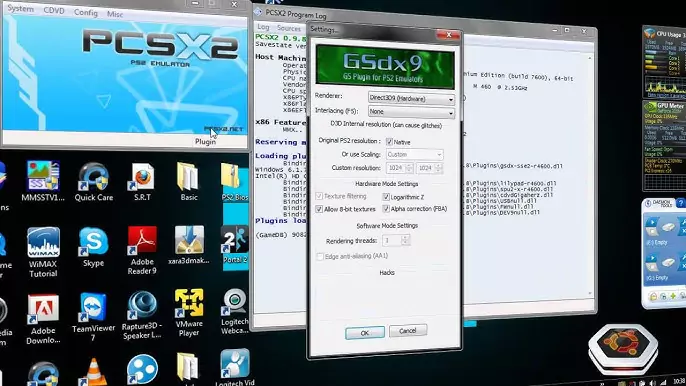
Add the BIOS to PCSX2
To complete the setup:
- Open PCSX2 on your PC
- Go to the Config menu
- Select BIOS/Plugin Selector
- Click the BIOS tab
- Browse to the folder where you saved the BIOS file
- Select it and click OK
Now the emulator will recognize your BIOS, and you’ll be ready to start loading games legally and safely.
Another Way to Download PS2 BIOS
If you’re not ready to extract the BIOS from your own console or simply want a faster option, there’s a simpler way—but it’s important to proceed with care.
While dumping from your own PlayStation 2 is the safest legal method, many users prefer to access pre-collected BIOS files from trusted sources. That’s where PCSX2BIOS.com comes in.
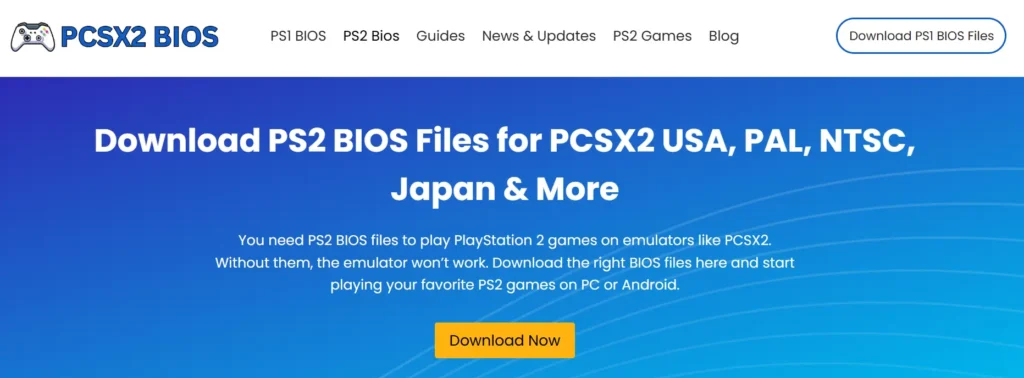
Step 1: Go to PCSX2BIOS.com
Visit PCSX2BIOS.com, where you’ll find a selection of PS2 BIOS files available to download. These files are sorted by version and region, so you can quickly find what works with your setup.
Step 2: Pick the Right BIOS File
Each file is clearly labeled—whether you need a USA, Europe, or Japan version, or if you’re looking for something specific like v1.60, v2.00, or others. Just click on the version that matches your game’s region. The download starts automatically, and there’s no signup required.
Step 3: Extract the BIOS File on Your Device
Once the file downloads, you’ll find it inside a compressed folder.
- On Windows, right-click the file and choose Extract Here (you can use tools like WinRAR or 7-Zip).
- On Android, apps like ZArchiver can unzip the file easily.
The extracted file should end in .bin. If it doesn’t, check the folder—it may still be compressed or renamed.
Step 4: Load the BIOS in Your Emulator
Open your emulator PCSX2 for PC or AetherSX2 if you’re using Android. Then:
- Go to the BIOS settings
- Browse to the folder where you saved the extracted file
- Select the BIOS and confirm
Once loaded, choose your PS2 game ISO file and start the emulator. If the BIOS was added correctly, your game should boot without issues.
Legal Considerations and Warnings for PS2 BIOS
Using a PlayStation 2 (PS2) BIOS involves several legal considerations and potential risks, especially when it’s used outside of an actual PS2 console. Below are the key legal and ethical points to be aware of:
The PS2 BIOS is proprietary software developed and owned by Sony Interactive Entertainment. It is protected under international copyright laws.
- Do not download PS2 BIOS files from the internet.
- Extract the BIOS from your own PS2 console if you need one.
- Use emulators only with legally obtained BIOS to avoid violating copyright law.
Common Issues and How to Fix Them
Even with the right BIOS file, issues can still come up. Here’s how to handle the most common problems.
BIOS Not Detected in PCSX2
If PCSX2 isn’t showing your BIOS file:
- Wrong Folder: Make sure the file is in the correct
biosfolder inside your PCSX2 directory. - File Type Issue: Only
.binfiles are supported. If it’s zipped or in another format, extract it first. - Missing Permissions: Run PCSX2 as administrator to give it access to system folders.
- Invalid File: Some files downloaded online may be broken or incomplete. If you’re not using a BIOS from your own console, this could be the problem.
Game Won’t Start Even with BIOS
If the emulator loads the BIOS but not your game:
- Check ISO File: Make sure the game file is complete and not corrupted. It should end in
.isoor.bin. - Region Mismatch: Use a BIOS file that matches your game’s region (USA, Europe, Japan).
- Wrong Settings: Reset the emulator’s settings to default. Go to Config and click Clear All Settings.
- Bad Plugins: Update your PCSX2 plugins or switch to the latest stable build. Some older plugins may cause compatibility issues.
If none of these work, try a different game to see if the issue is with the ISO itself.
Final Thoughts
Setting up the PS2 BIOS for PCSX2 may take a few steps, but once it’s done, you’ll have access to a large library of PlayStation 2 games on your computer. In addition, understanding which PS2 BIOS to use can relly be helpful while setting ps2 bios files.
Always remember, the safest and most legal way to get a BIOS is by dumping it from your own PS2 console. This keeps your setup compliant and your emulator running as intended.
Avoid shortcuts that involve unverified downloads. Stick with safe files, official tools, and responsible use. It keeps your system clean, your gaming smooth, and your experience hassle-free.


One Comment