
How to Dump the PS1 BIOS from Your PSP (Legally and Safely)
You can dump the PS1 BIOS from your PSP using custom firmware and a file manager like PSP Filer. This method extracts the BIOS directly from your own hardware, making it legal and safe for emulator use.
It also ensures better game compatibility and performance in emulators such as RetroPie, DuckStation, or ePSXe. This step-by-step guide walks you through everything you need in a clear, beginner-friendly format.
What Is PSP?
PSP stands for PlayStation Portable. It is a handheld gaming console developed by Sony, first released in 2004. The PSP allows users to play games, watch movies, listen to music, browse the internet, and even run homebrew software. It was part of Sony’s PlayStation family and was widely popular for its powerful hardware and high-quality graphics for a portable device.
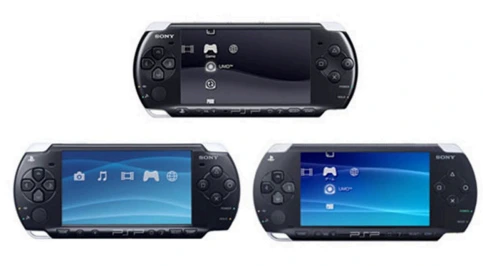
There are several models of the PSP, including:
- PSP-1000 (the original “fat” model)
- PSP-2000 (slimmer and lighter)
- PSP-3000 (with an improved screen and microphone)
- PSP Go and PSP Street (later variants with design changes)
The PSP also supports PS1 game emulation, making it useful for extracting BIOS files for use in emulators like DuckStation or RetroPie.
Requirements to Dump PS1 BIOS FROM PSP
To successfully dump your BIOS, make sure you have the following:
| Item | Details |
|---|---|
| A PSP console | PSP 1000, 2000, or 3000 with Custom Firmware (CFW) installed (e.g., PRO-C2) |
| A Memory Stick Duo | At least 512MB free space |
| PS1 Game (EBOOT.PBP) | A converted PS1 game or official PS1 title downloaded via PSN |
| USB Cable | To transfer files to/from your PC |
| Simple Popstation GUI or PSX2PSP (Optional) | Used to extract BIOS from EBOOT.PBP on PC |
How to Dump PS1 BIOS from a PSP: Step-by-Step Guide
Dumping the PS1 BIOS (scph1001.bin, scph5501.bin, etc.) from your own PSP is a great way to run PlayStation 1 games on emulators like ePSXe, DuckStation, or RetroArch.
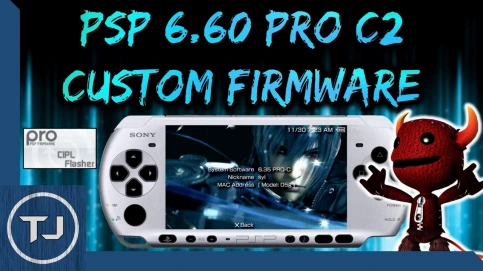
Step 1: Install Custom Firmware on Your PSP
You must have CFW installed on your PSP to run homebrew and manage files. This is a crucial step as it allows your PSP to run unsigned code, which is necessary for the BIOS dumping process.
- Search for and install PRO-C2 CFW (or LME for later models). These are popular and stable custom firmwares for the PSP.
- Follow guides specific to your PSP model (YouTube or trusted CFW websites). The installation process can vary slightly depending on your PSP model (1000, 2000, 3000, Go, Street) and its current official firmware version. Always refer to up-to-date and reputable sources for detailed instructions.
- Once installed, enable “Fast Recovery” if available to load custom firmware on boot. This ensures that the CFW is active every time you turn on your PSP.
Note: Installing custom firmware is legal and reversible. It does not permanently alter your PSP and can be removed if you wish to revert to official firmware.
Step 2: Get or Convert a PS1 Game into EBOOT.PBP Format
To extract the PS1 BIOS, you need a PS1 game in EBOOT.PBP format. This file contains the encrypted PS1 BIOS that we will later extract.
There are two legal ways to get a PS1 EBOOT:
- Download a PS1 Classic from the PlayStation Store on your PSP or PS3 and transfer it to your PSP. This ensures you have a legally acquired game.
- Convert your own legally owned PS1 game ISO to EBOOT.PBP using tools like: PSX2PSP v1.4.2 , Popstation GUI
This EBOOT file contains the PS1 BIOS in encrypted form, which we’ll extract in the next steps.
Step 3: Transfer the EBOOT.PBP File to Your PC
Once you have your PS1 game in EBOOT.PBP format on your PSP, you need to transfer it to your computer for the extraction process.
- Connect your PSP to your PC using a USB cable. Make sure your PSP is in USB mode (usually found under the ‘Settings’ or ‘USB Connection’ menu on the PSP).
- Navigate to the game folder on your PSP. This is typically located at: PSP/GAME/YourGameFolder/EBOOT.PBP
- Copy the EBOOT.PBP file to a convenient location on your PC, such as your desktop or a dedicated folder for BIOS dumping.
Step 4: Use a Tool to Extract the PS1 BIOS
Now you’ll use a tool like PSX2PSP or Simple Popstation GUI to extract the BIOS from the EBOOT file. These tools decrypt the EBOOT.PBP file and allow you to access the embedded PS1 BIOS.
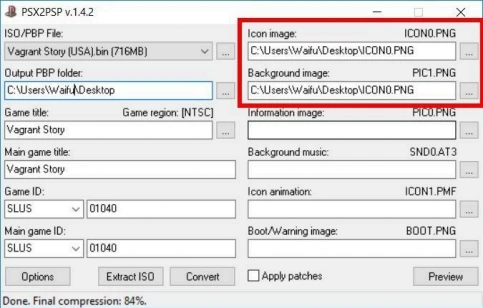
Method 1: Using PSX2PSP
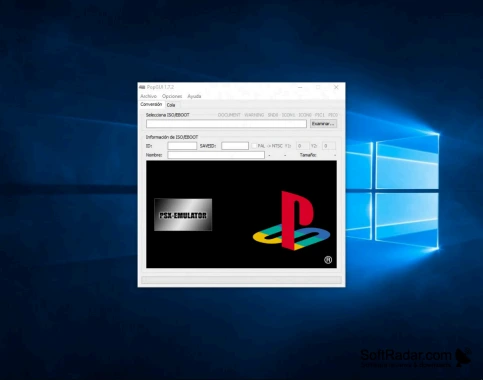
PSX2PSP is a popular and user-friendly tool for converting PS1 games to PSP format, and it also includes a function to extract the BIOS.
- Download PSX2PSP v1.4.2 (it’s typically a portable Windows application, so no installation is required).
- Launch the application. You will see an interface similar to the image below.
- Go to the “Extract ISO/BIN from EBOOT” option within the tool.
- Load your EBOOT.PBP file that you transferred from your PSP.
- Initiate the extraction process. The output will include the game files (usually in ISO or BIN format) and, crucially, the PS1 BIOS file.
Method 2: Using Simple Popstation GUI
Simple Popstation GUI is another effective tool for managing PS1 EBOOT files and can also be used for BIOS extraction.
- Download and run Simple Popstation GUI.
- Choose “Extract ISO” or “Open EBOOT” option from the interface.
- Select your EBOOT.PBP file. The tool will then process the file.
- It will create a folder with extracted files. Look for files named like: scph1001.bin (USA region BIOS), scph5501.bin (USA region BIOS), scph7003.bin (Japan region BIOS)
- Rename and organize them accordingly for easy identification.
Step 5: Save and Test the BIOS File
Once you have successfully extracted the .bin BIOS file, the next step is to place it in the correct directory for your chosen emulator and test it.
1. Move the extracted .bin BIOS file to your emulator’s BIOS folder:
- For ePSXe: Place it in the \bios\ folder inside the emulator directory.
- For DuckStation: Set the BIOS directory under Settings > BIOS within the emulator.
- For RetroArch: Place it in the system folder and configure it under Core Settings for the specific PS1 core you are using.
2. Open the emulator and select the BIOS file. Most emulators will automatically detect the BIOS if placed in the correct folder, but some may require manual selection.
3. Load a PS1 game to confirm it works. If the game loads and runs correctly, your BIOS dump was successful!
What BIOS Files Look Like
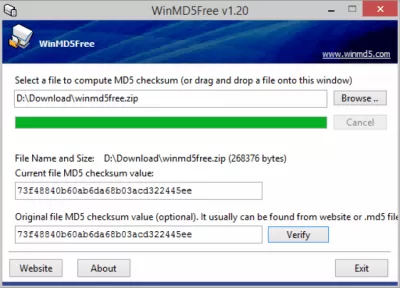
PS1 BIOS files typically have .bin extensions and specific filenames that often indicate their region and version. It is crucial to verify the integrity of your dumped BIOS file using its MD5 hash to ensure it is not corrupted and is a legitimate dump.
| Filename | Region | MD5 Hash (for verification) |
| scph1001.bin | USA | 924e392ed05558ffd b115408c263dccf |
| scph5501.bin | USA | 8dd7d5296a650fac7 319bce665a6a53c |
| scph7003.bin | Japan | b9d9f65f52c6c3fc4 fa6d9b6b55f1e57 |
Use tools like WinMD5 or HashCalc to verify the dump is correct. This step is vital for ensuring compatibility and preventing issues with your emulator.
How to Protect Your PSP While Dumping BIOS?
Following best practices ensures legality and long-term success of your BIOS dump and the health of your PSP.
- Never share your BIOS online: Keep it for personal use. Distributing copyrighted BIOS files is illegal.
- Label the file clearly: Use descriptive names like PSP1000_BIOS.bin to remember its origin.
- Backup the file in multiple locations: Store copies on external drives, cloud storage, or other secure places to prevent data loss.
- Avoid corrupting or editing the BIOS: Unless you are specifically doing advanced emulator testing, do not modify the BIOS file.
- Store it in the correct directory: Always place the BIOS file in the designated BIOS folder of your emulator setup.
Why Use a PSP-Dumped BIOS?
Using a PSP-dumped BIOS (also called a “PSP BIOS dump”) is essential if you’re trying to emulate or run PlayStation Portable (PSP) games on certain emulators. While most PSP games run fine without it in emulators like PPSSPP, having a real BIOS dump ensures that games behave more like they do on an actual PSP.
It also enables features like the official boot animation, plugin support, and full system emulation. Most importantly, dumping the BIOS from your own PSP keeps your setup legal and secure, avoiding the risks of downloading BIOS files from unverified sources.
Want to take it further? Explore advanced testing methods in this PS1 BIOS Corruption Guide ideal for emulators, glitch testing, and experimental setups.
Conclusion
Dumping the PlayStation 1 BIOS from your PSP is a safe and legal way to enhance your emulator setup. This method gives you a clean, compatible BIOS that mirrors your original PlayStation hardware. Using tools like PSP Filer and custom firmware, you can extract the BIOS in under 10 minutes. It’s an essential step for RetroPie, DuckStation, and other PS1 emulators that require real BIOS files to operate correctly.
Always back up your BIOS file and avoid modifying it unless you’re doing emulator testing in a safe environment. Most importantly, don’t share it online it’s for your use only. By following this guide, you gain full control over your PS1 emulation experience while staying within legal boundaries.
FAQs
Is dumping the PS1 BIOS from my PSP legal?
Yes, it’s legal if you own the PSP and you’re extracting the BIOS for personal use, such as running emulators you legally own. Sharing or downloading BIOS files online remains illegal.
Do I need to modify my PSP permanently to dump the BIOS?
No. You only need to install temporary or permanent custom firmware, which can be safely removed or reset if needed. The PSP hardware itself is not permanently changed.
Will dumping the BIOS affect my PSP games or saved data?
No, dumping the BIOS only reads a system file from the firmware. It doesn’t change your game saves, settings, or installed content.
Which PSP models are compatible for BIOS dumping?
Most PSP models work, including PSP-1000, PSP-2000, and PSP-3000. Some steps may vary slightly depending on firmware versions.